
And now for something completely different!
I was diagnosed with type 2 diabetes about two years ago, just before SIGCSE 2024 in Portland. It seems like it’s been much longer.
After my PCP told me I didn’t need to track my blood sugar – I just needed to change to my diet, easy peasy! – I insisted on a referral to a diabetes education, and also changed PCPs as soon as I could. Nurse Toma hooked me up with a continuous glucose monitor (CGM), without which lifestyle changes would have been much more difficult. My insurance covered both the Dexcom G6 and the Abbot Freestyle Libre 3 sensors, so I tried them both, and preferred the Libre 3.
I was mildly annoyed by the Libre 3 app’s insulin data entry fields, which were prominent but not relevant to me. I was more annoyed by the low glucose alarms, which needlessly woke me in the middle of the night when I slept on my arm wrong and squashed the skin around the sensor (for the uninitiated, this is called a compression low).
But the data was worth it – not just one data reading on my fasting blood sugar first thing in the morning, but everything that happened overnight, and not just one data reading two hours after each meal, but the shapes of the peaks and troughs. And without the inconvenience of doing and recording fingerstick tests four or more times per day. Over weeks and months, the Glucose Management Indicator (GMI) provides a real-time proxy for the A1C blood test, which is the main diagnostic criterion for type 2 diabetes.
When I moved to the UK for my sabbatical, I brought as many Libre 3 sensors as my insurance would permit. But with the discontinuation of Libre 3 in favor of the “new and improved” and more expensive Libre 3 Plus, my insurance would only pay for one 15-day sensor at a time. I hadn’t yet gotten myself into the NHS system, and in any case, the NHS doesn’t cover CGMs for people who don’t use insulin. I started buying Libre 3 Plus sensors through online pharmacies in the UK, where they cost over £150 for a one-month supply. I also learned that sensors are region-coded to work only with the corresponding regional app release, so I could not alternate sensors purchased from UK online pharmacies with sensors dispensed under prescription in the US.
Before Christmas I started looking into lower-cost alternatives. In January I started using the Abbot Lingo sensor, marketed to people without diabetes for managing weight and health risks. Despite the lack of explicit support for people with diabetes, it seemed like it was worth a try. Over a 4 month period of use, the Lingo app drove me crazy with its bugs and persuasive messaging – potential topics for two further blog posts. I also learned it wasn’t providing me with the information I needed, a topic I’ll address here.
So, between the Lent and Easter terms, I once again investigated alternatives. Last month I switched to Dexcom ONE+, a new CGM system designed for people with Type 1 or 2 diabetes.
Why didn’t I find this product in the first place? It turns out that three other non-prescription CGM systems have hit the market since I first started using a CGM. Lingo was the earliest, and the only one I had heard of. Lingo’s most direct competor is Dexcom Stelo, which is only available in the US. By contrast, the Dexcom ONE+ is only available in the UK and Europe. Dexcom released both new products in 2024, and at first I didn’t even realize they were two separate products. In 2024, Abbot also released the Freestyle Rio for people with type 2 diabetes, but only in the US. It’s confusing, but I’ll also admit my initial research was inadequate.
Ideally I’d compare Dexcom One+ with Abbot Freestyle Rio, since they are both CGM systems designed for people with diabetes but available without a prescription. Or I’d compare Abbot Lingo with Dexcom Stelo, since they are both designed for people without diabetes who nonetheless want to manage their blood glucose levels. But instead I’ll compare the two products that are available in the UK – Abbot Lingo and Dexcom ONE+ – to show why I decided to switch.
Beginning the user journey – ordering sensors online
In the UK, both Abbot Lingo and Dexcom One+ sensors can be purchased directly from their respective manufacturers. Both offer options to buy a single sensor or an ongoing subscription.
- A Lingo subscription is paid three months at a time, but shipped one month at a time (two sensors lasting 14 days each). Abbot also offers the option to buy a one-month supply without further commitment.
- A ONE+ subscription can be paid either monthly or quarterly. Shipping corresponds to payment – a monthly subscription is paid and shipped monthly, while a quarterly subscription is paid and shipped quarterly. Since each sensor lasts just 10 days, a one-month supply is three sensors. When I signed up for a quarterly subscription, it was a pleasant surprise to receive a box full of nine CGM sensors – more efficient and less worrying than receiving them one or two at a time.
Buying the sensors was actually not the first part of my ONE+ user journey. Dexcom offers a free sample to new customers, so I filled out the request form online in March. But they never got back to me, perhaps because I already had a Dexcom account from trying the G6 sensor two years ago. I think they made a poor choice: ONE+ wasn’t even on the market yet when I tried the G6, and in any case it seems unwise to ignore a potential customer. But I was so fed up with Lingo that I decided to buy my first ONE+ sensor anyway.
Configuring the app
Both apps require you to create an online account and use it for authentication. Both apps require you to provide some personal informations. Both apps provide the option to connect with Apple Health, taking exercise data and providing blood glucose data.
ONE+ lets you choose units during setup (mg/dL or mmol/L), whereas Lingo in the UK uses the local standard of mmol/L.
Like prescription CGM systems, ONE+ lets you configure target ranges (the default is 3.9 – 10 mmoL/L or 70-180 mg/dL, standard for diabetics) and enable or disable high and low glucose alerts. There are not mandatory alerts for extreme highs or lows, so I’m not woken up by compression lows like I was with Libre 3. System alerts for signal loss, sensor issues, and other technical issues can also be enabled and disabled.
By contrast, the Lingo target range is fixed to 3.9 – 7.8 mmol/L, considered normal for non-diabetic adults. The Lingo app asks for information about your meal schedule and your sleep schedule. It also makes you choose from one of five health goals: “boost energy,” “manage hunger,” “improve mood,” “better sleep” (note lack of parallelism), or “stay focused.” As a diabetic, my true goal (to manage my glucose) wasn’t there, so I chose “manage hunger.”
Lingo lets you enable or disable somewhat opaque groups of notifications: “Critical,” “Coaching,” “Progress,” “Reminders”, and “Challenges.” I’m not sure where high or low glucose alerts would fall in these categories.
Applying a sensor
The Lingo sensor and applicator come as separate components that must be assembled before use, which makes for a larger box. As for Libre 3, the Lingo applicator is triggered by pressure against the upper arm.
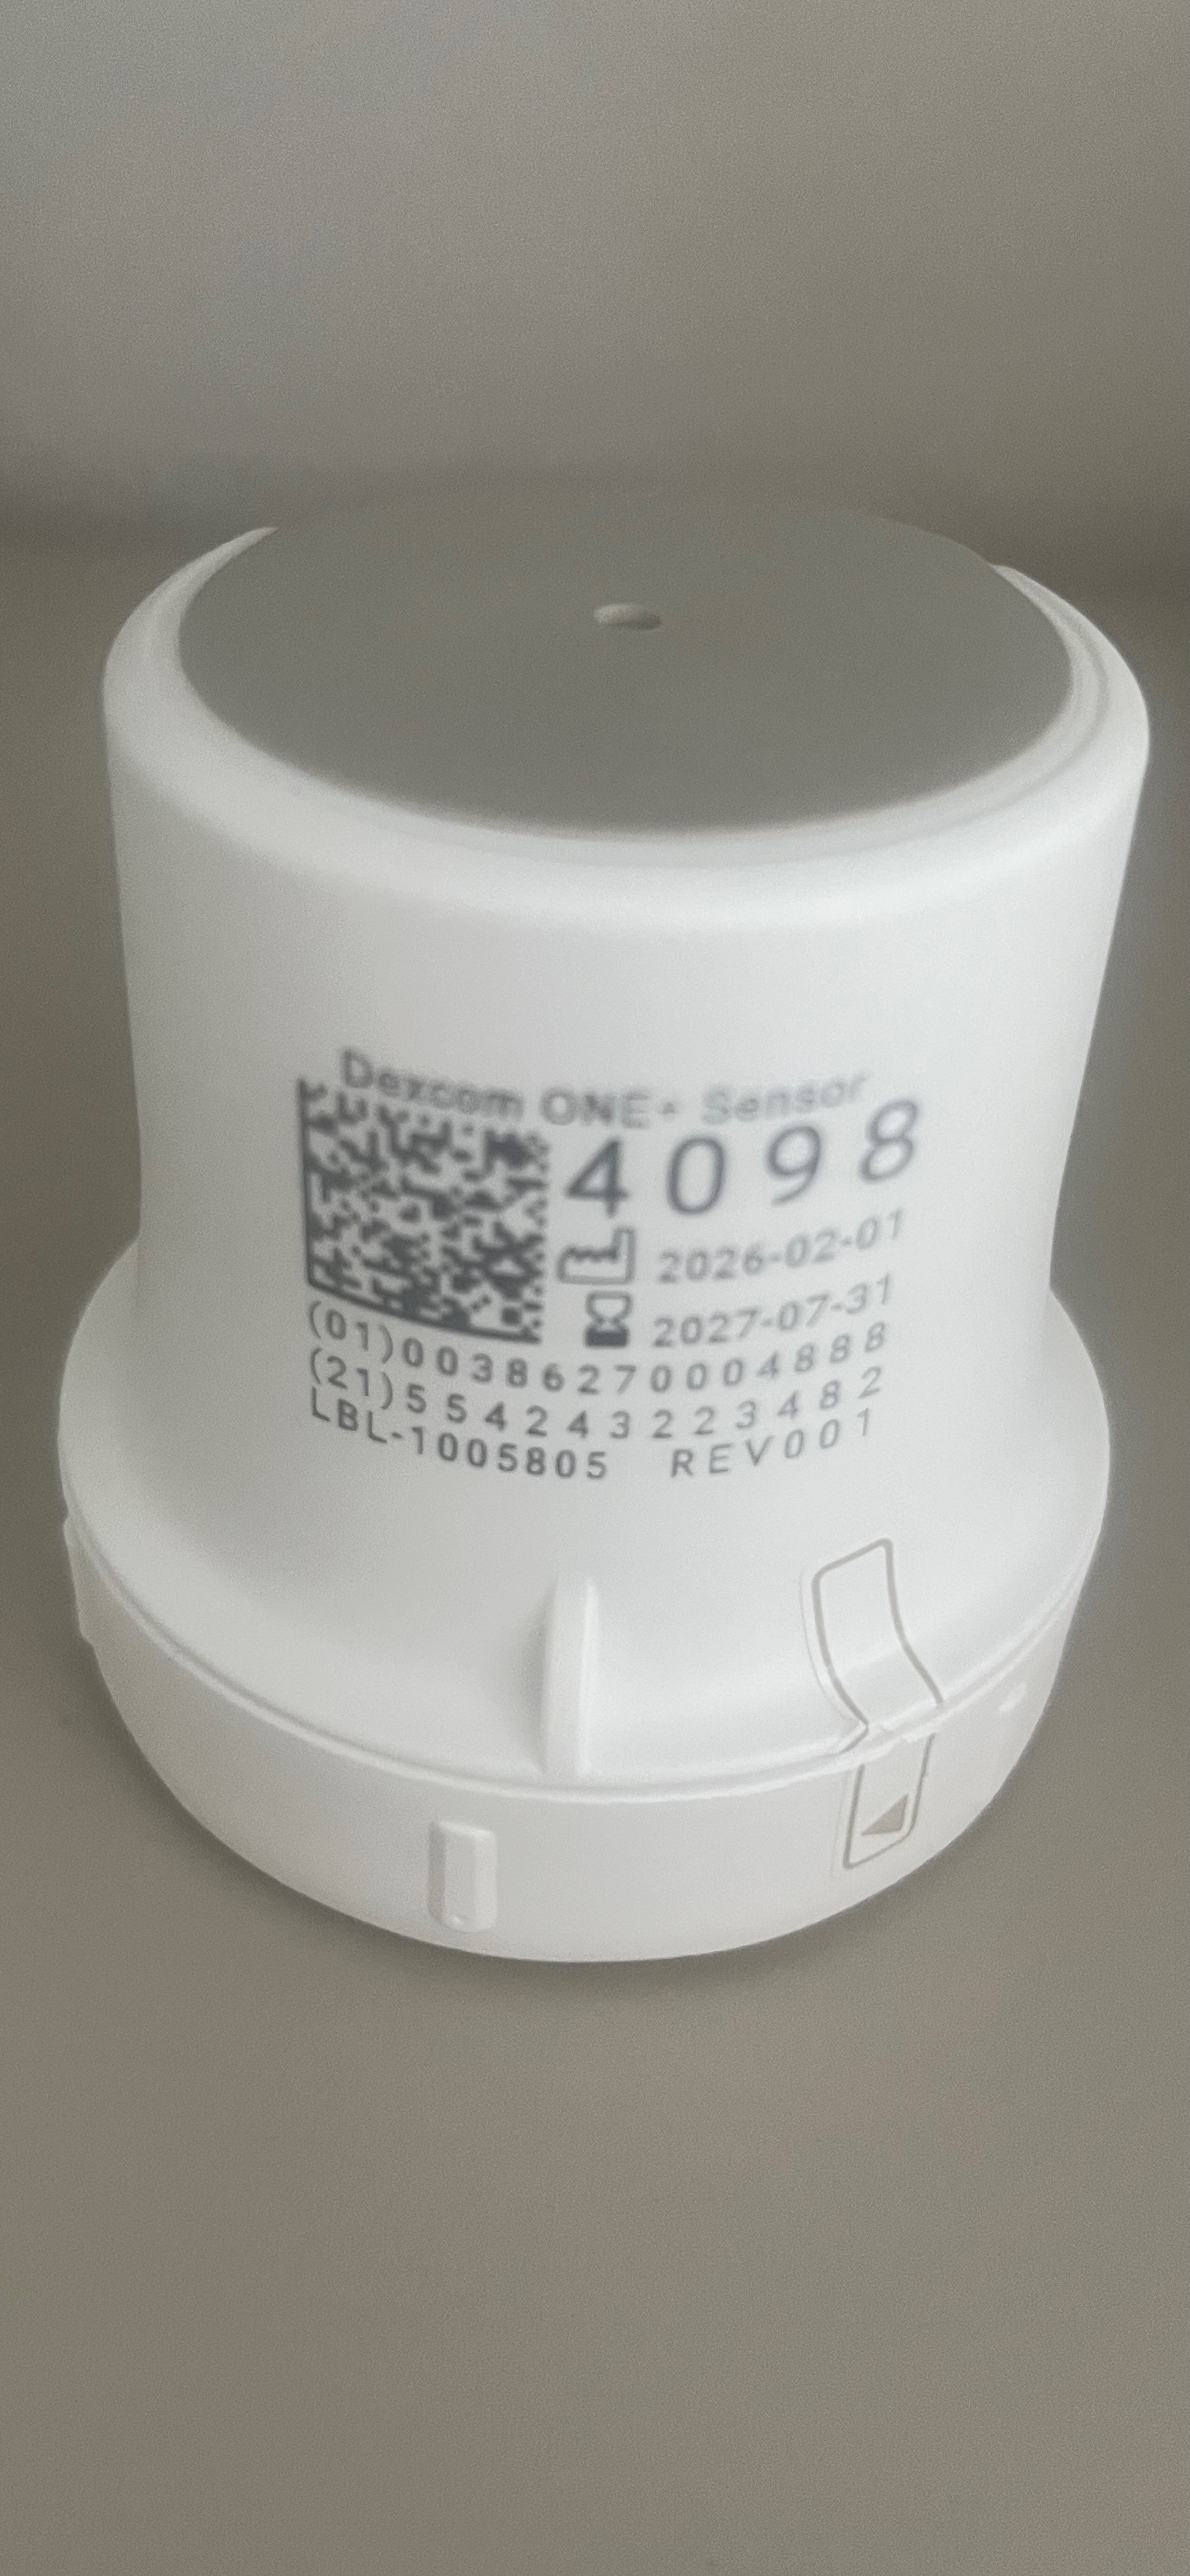
The ONE+ sensor is packaged with its applicator as a single unit. The sensor can be applied to the abdomen instead of the upper arm – I’m sticking with my arm. The applicator is triggered with a push button, not what I was used to, but not any more difficult.
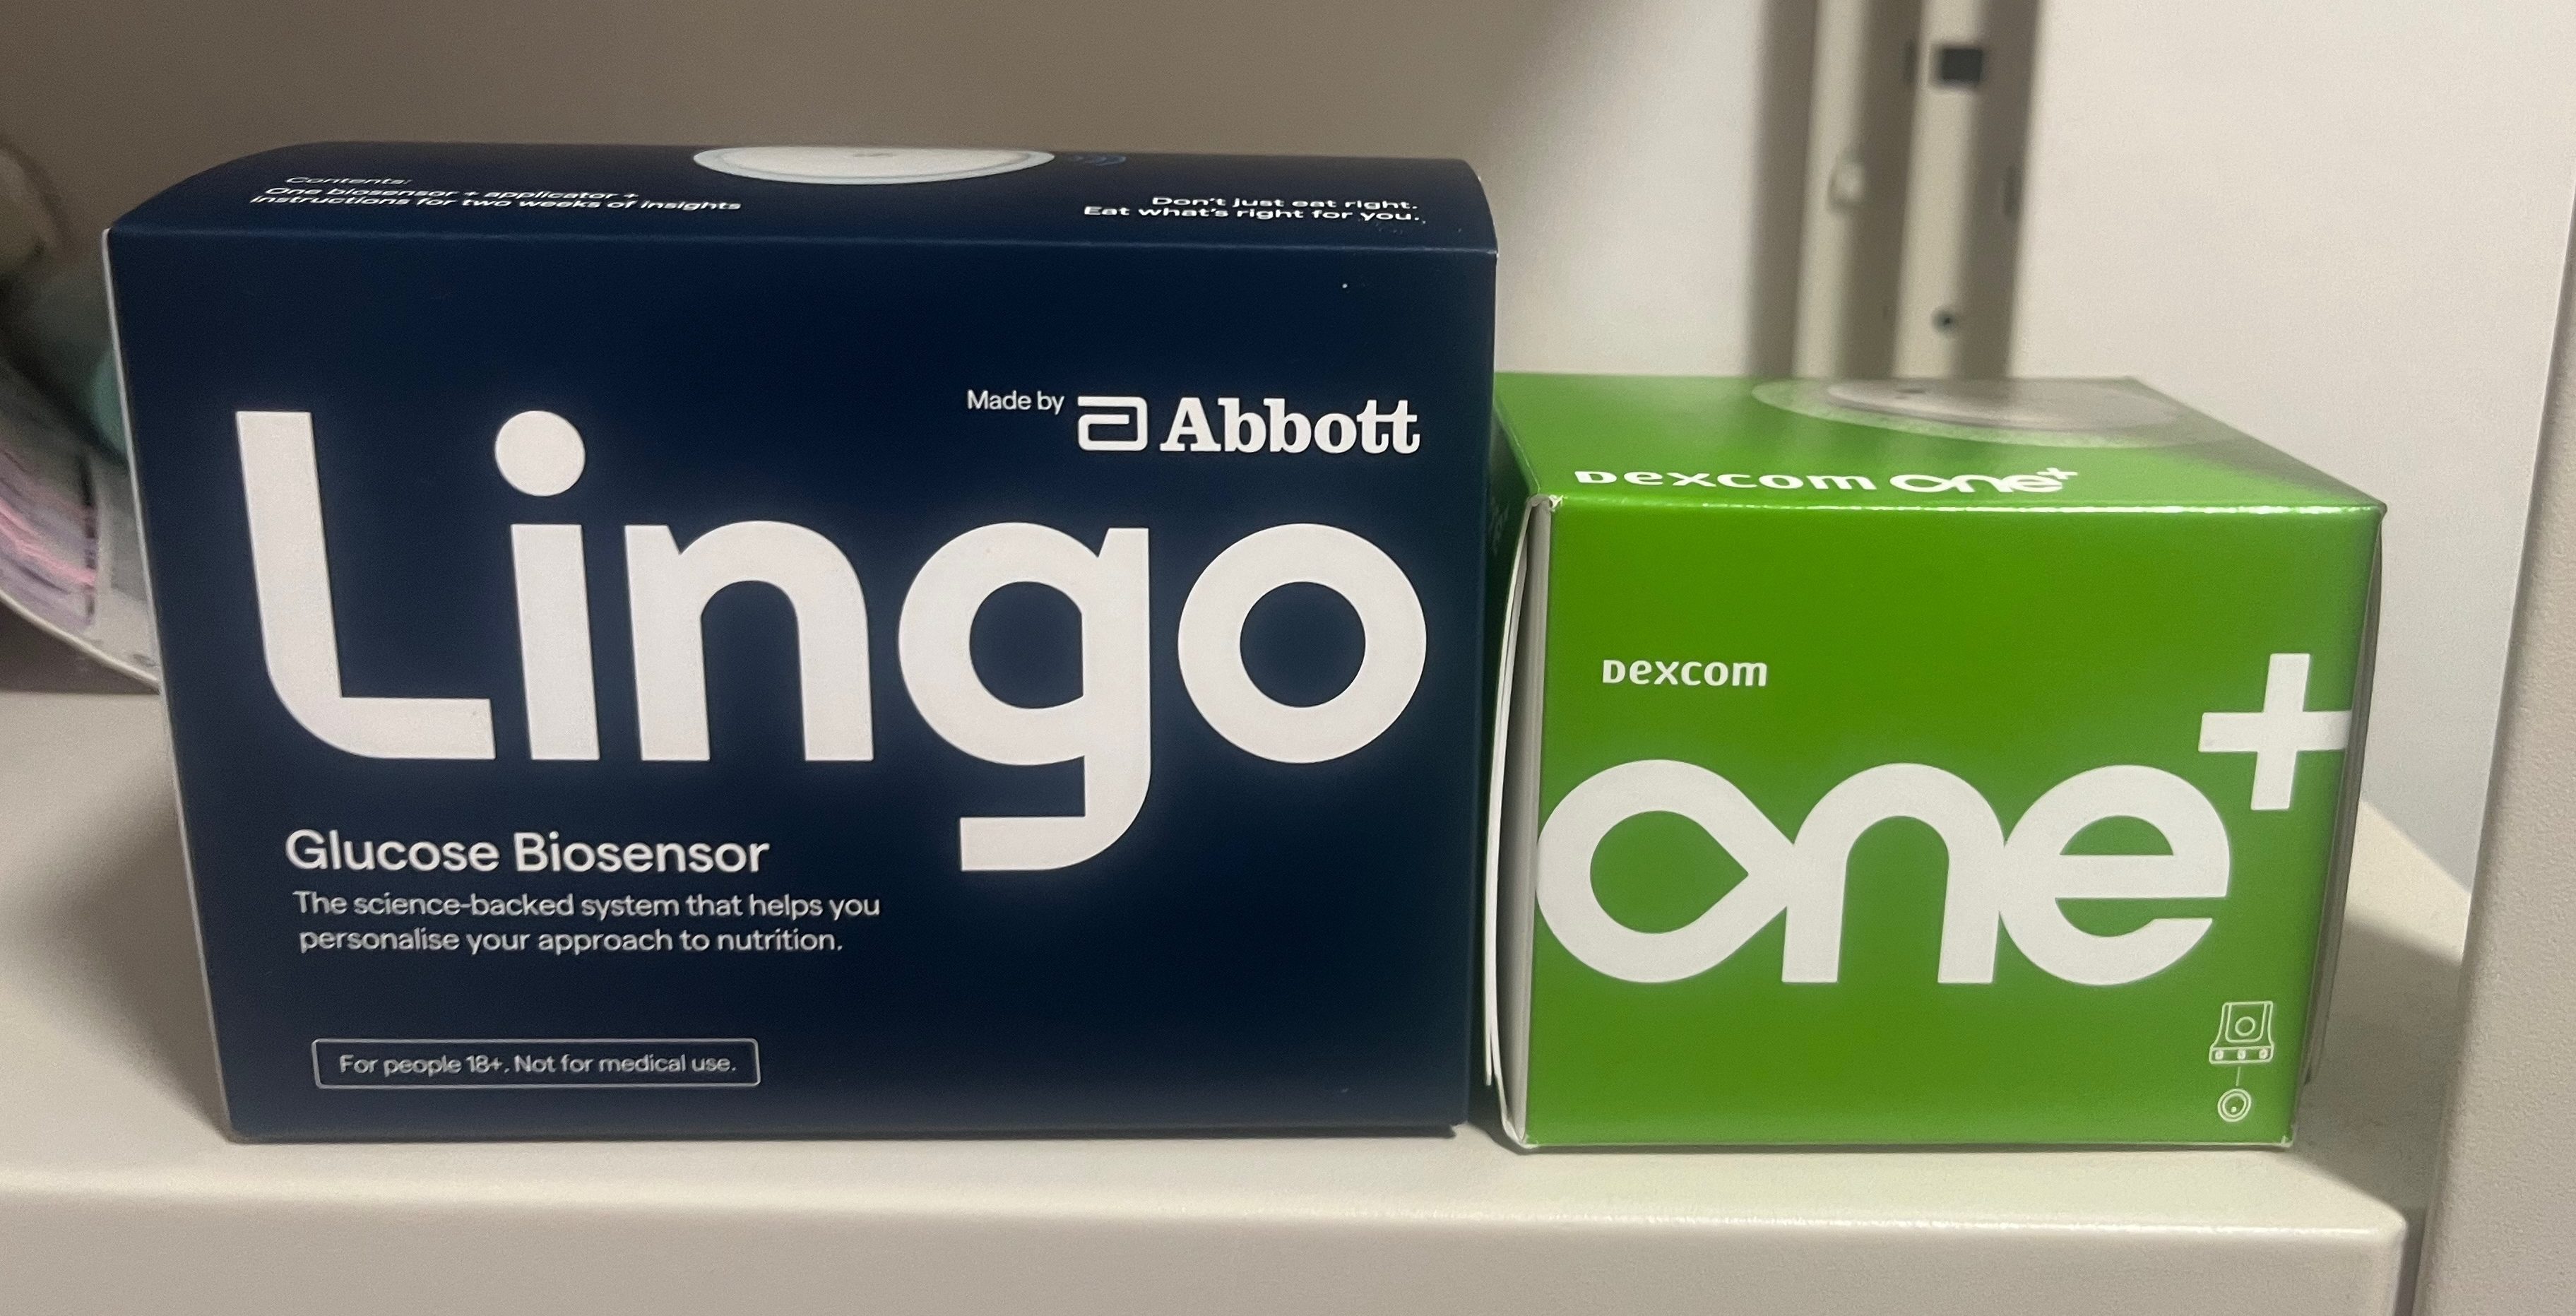
Two years ago, the size of the Dexcom G6 sensor was one factor leading me to choose Libre 3 instead. But the Lingo sensor has the same form factor as the Libre 2, significantly larger than the Libre 3 (35 vs 21 mm in diameter, 5 vs 2.9 mm in height). I thought I could get used to it, but I often whacked the Lingo sensor on doorways. I inevitably found it partially detached by the end of the 14-day usage period.
The ONE+ sensor is slightly smaller (L 27.3 mm long x 24 mm wide x 4.6 mm thick). I’ve had no trouble so far with sensors detaching before the end of the 10-day usage period. The ONE+ comes with an additional tape, which unfortunately I found difficult to apply (see photo below), but fortunately it seems to be unnecessary for me. I haven’t used the provided tape for any ONE+ sensor beyond the first.
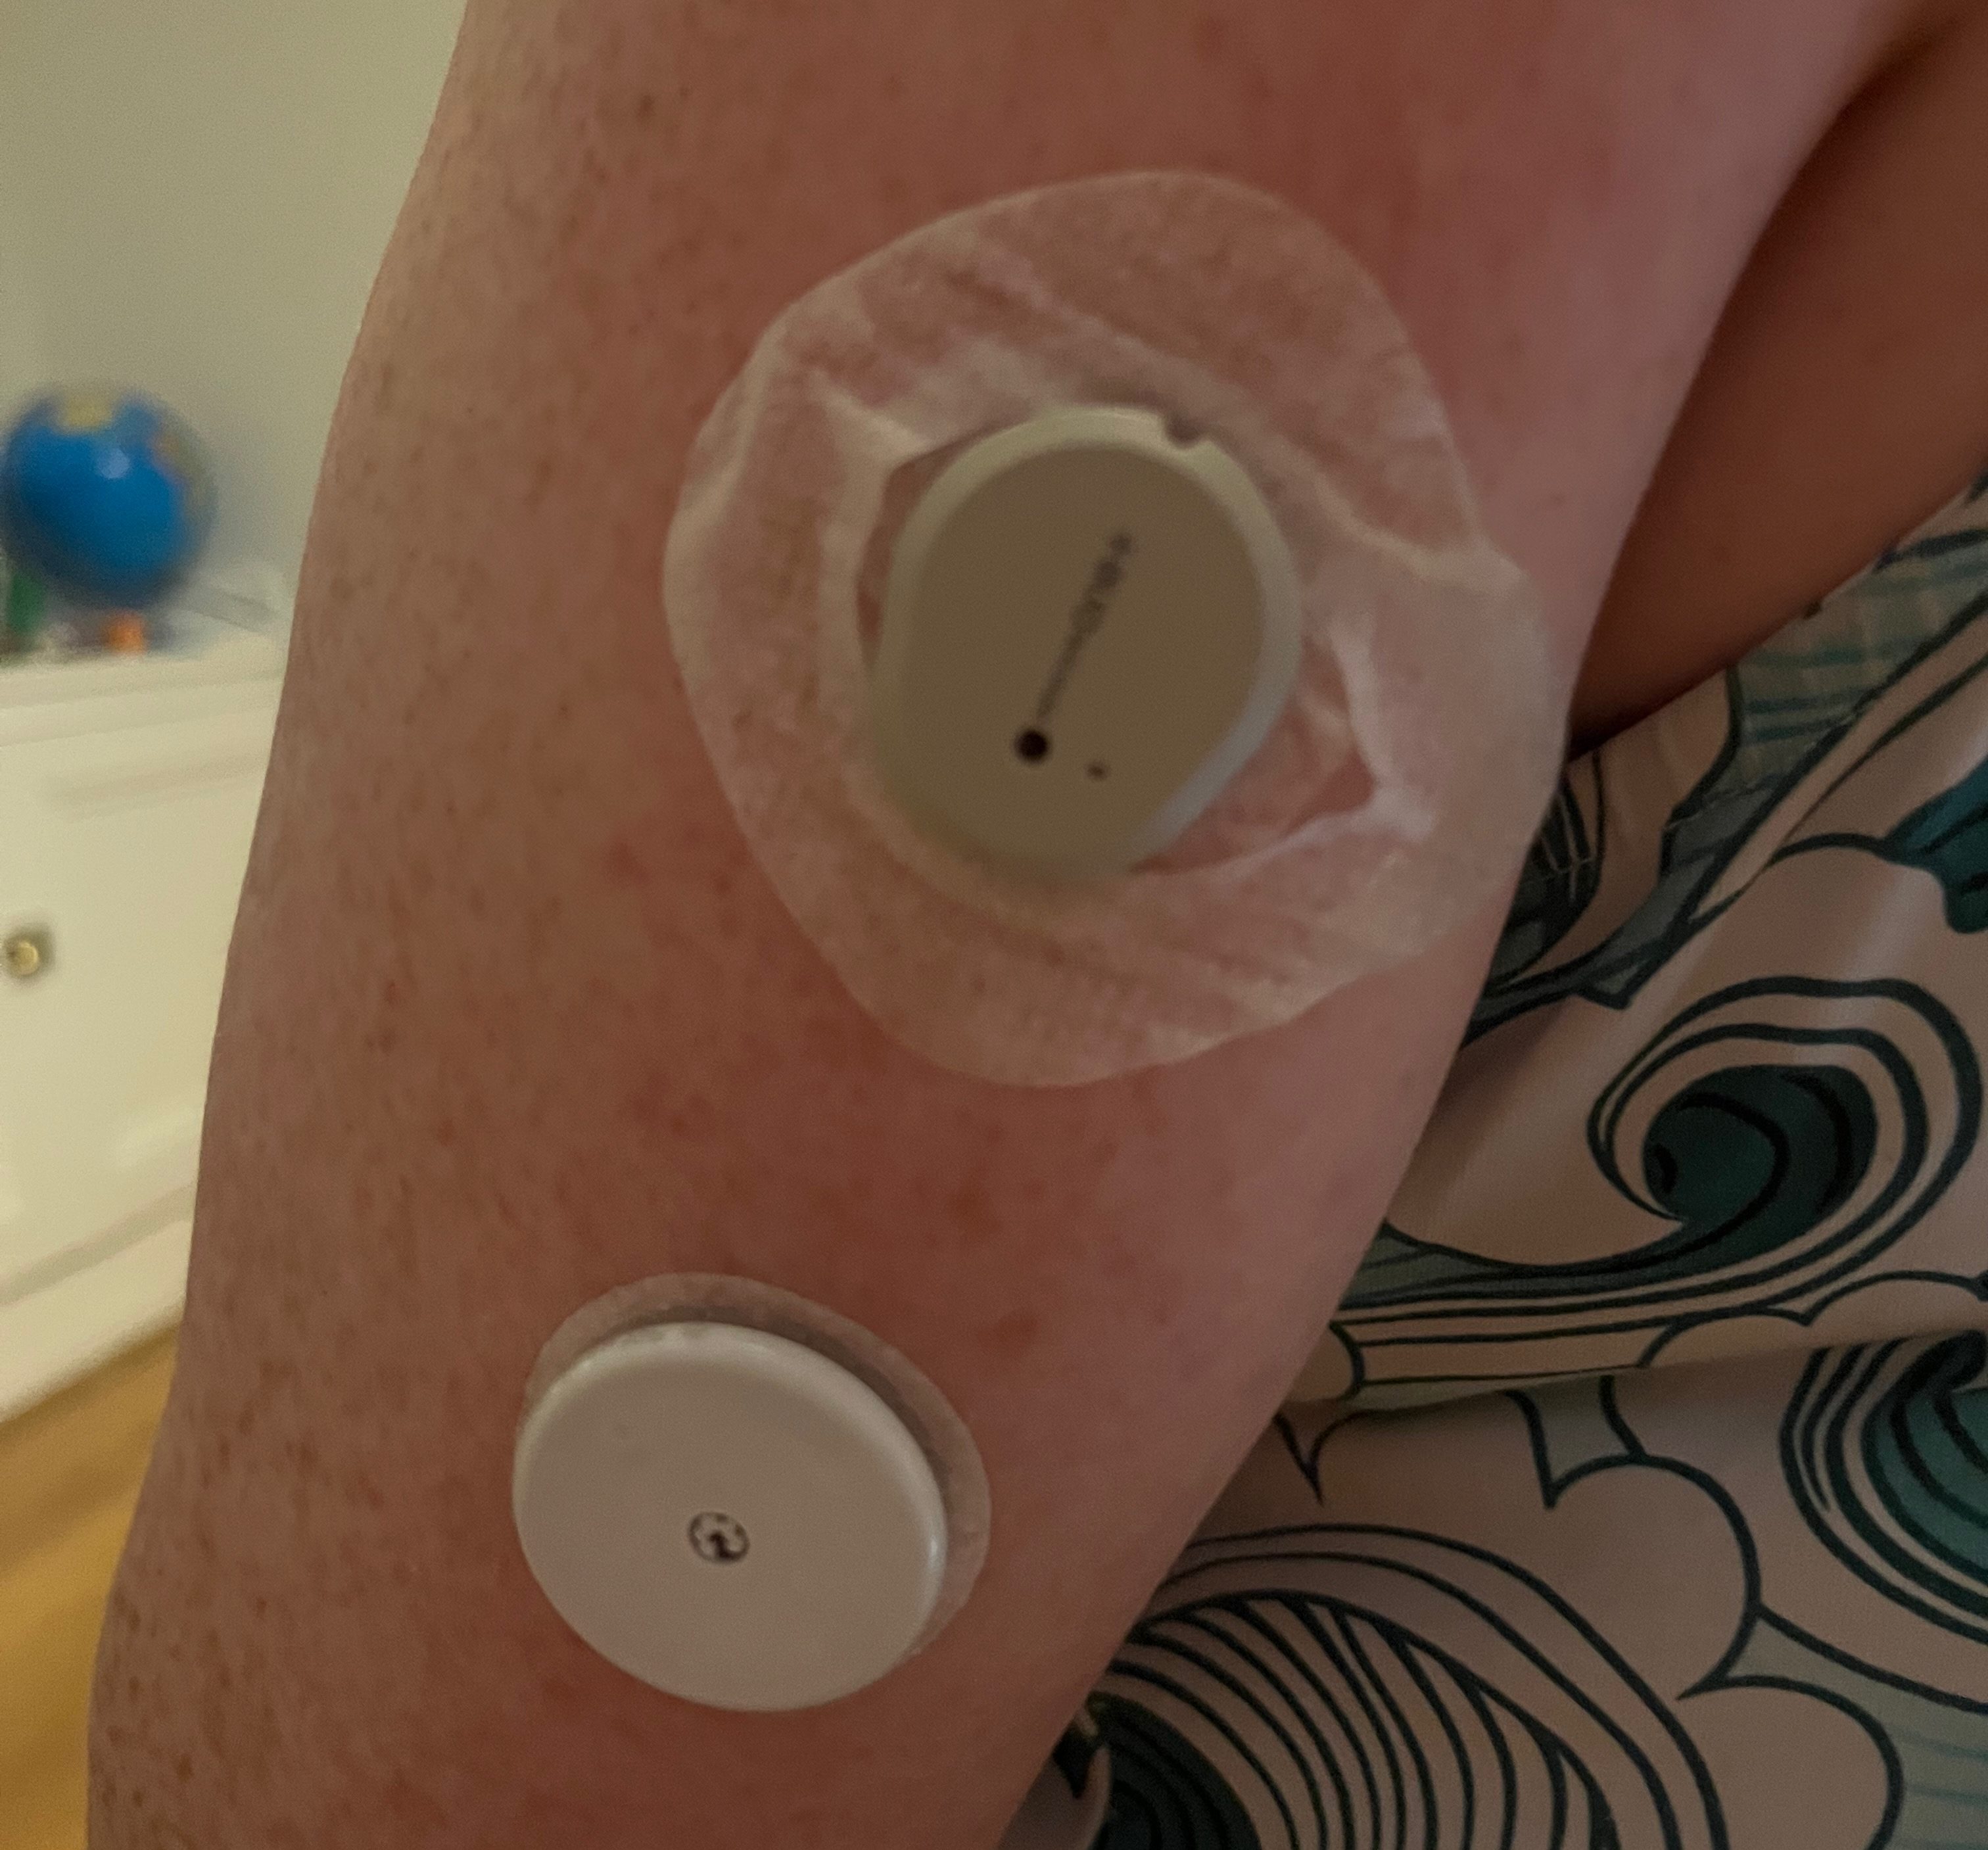
The ONE+ is grey and oblong with a tape messily applied around it, while the Lingo is a smooth white circle.
Starting a new sensor
Like other Abbot products, the Lingo sensor can be applied several hours or even a full day before starting the new sensor in the app. When I was a new Libre 3 user, I was advised to apply the sensor at my convenience, but only start it in the app after the old sensor expired. As for Libre 3, you start a new Lingo sensor by scanning it with your phone; my husband and I think the app bootstraps the Bluetooth connection using a Near Field Communication (NFC) protocol.
As for Libre 3, the Lingo sensor has a 60-minute warm up period, which begins when you scan the sensor. After scanning a new sensor, there is a 60-minute gap in the glucose readings. In the screenshot below, there is a significant discontinuity, with readings from the new sensor much lower than readings from the old sensor.
 |  |  |
glucose data before and after starting a new sensor.
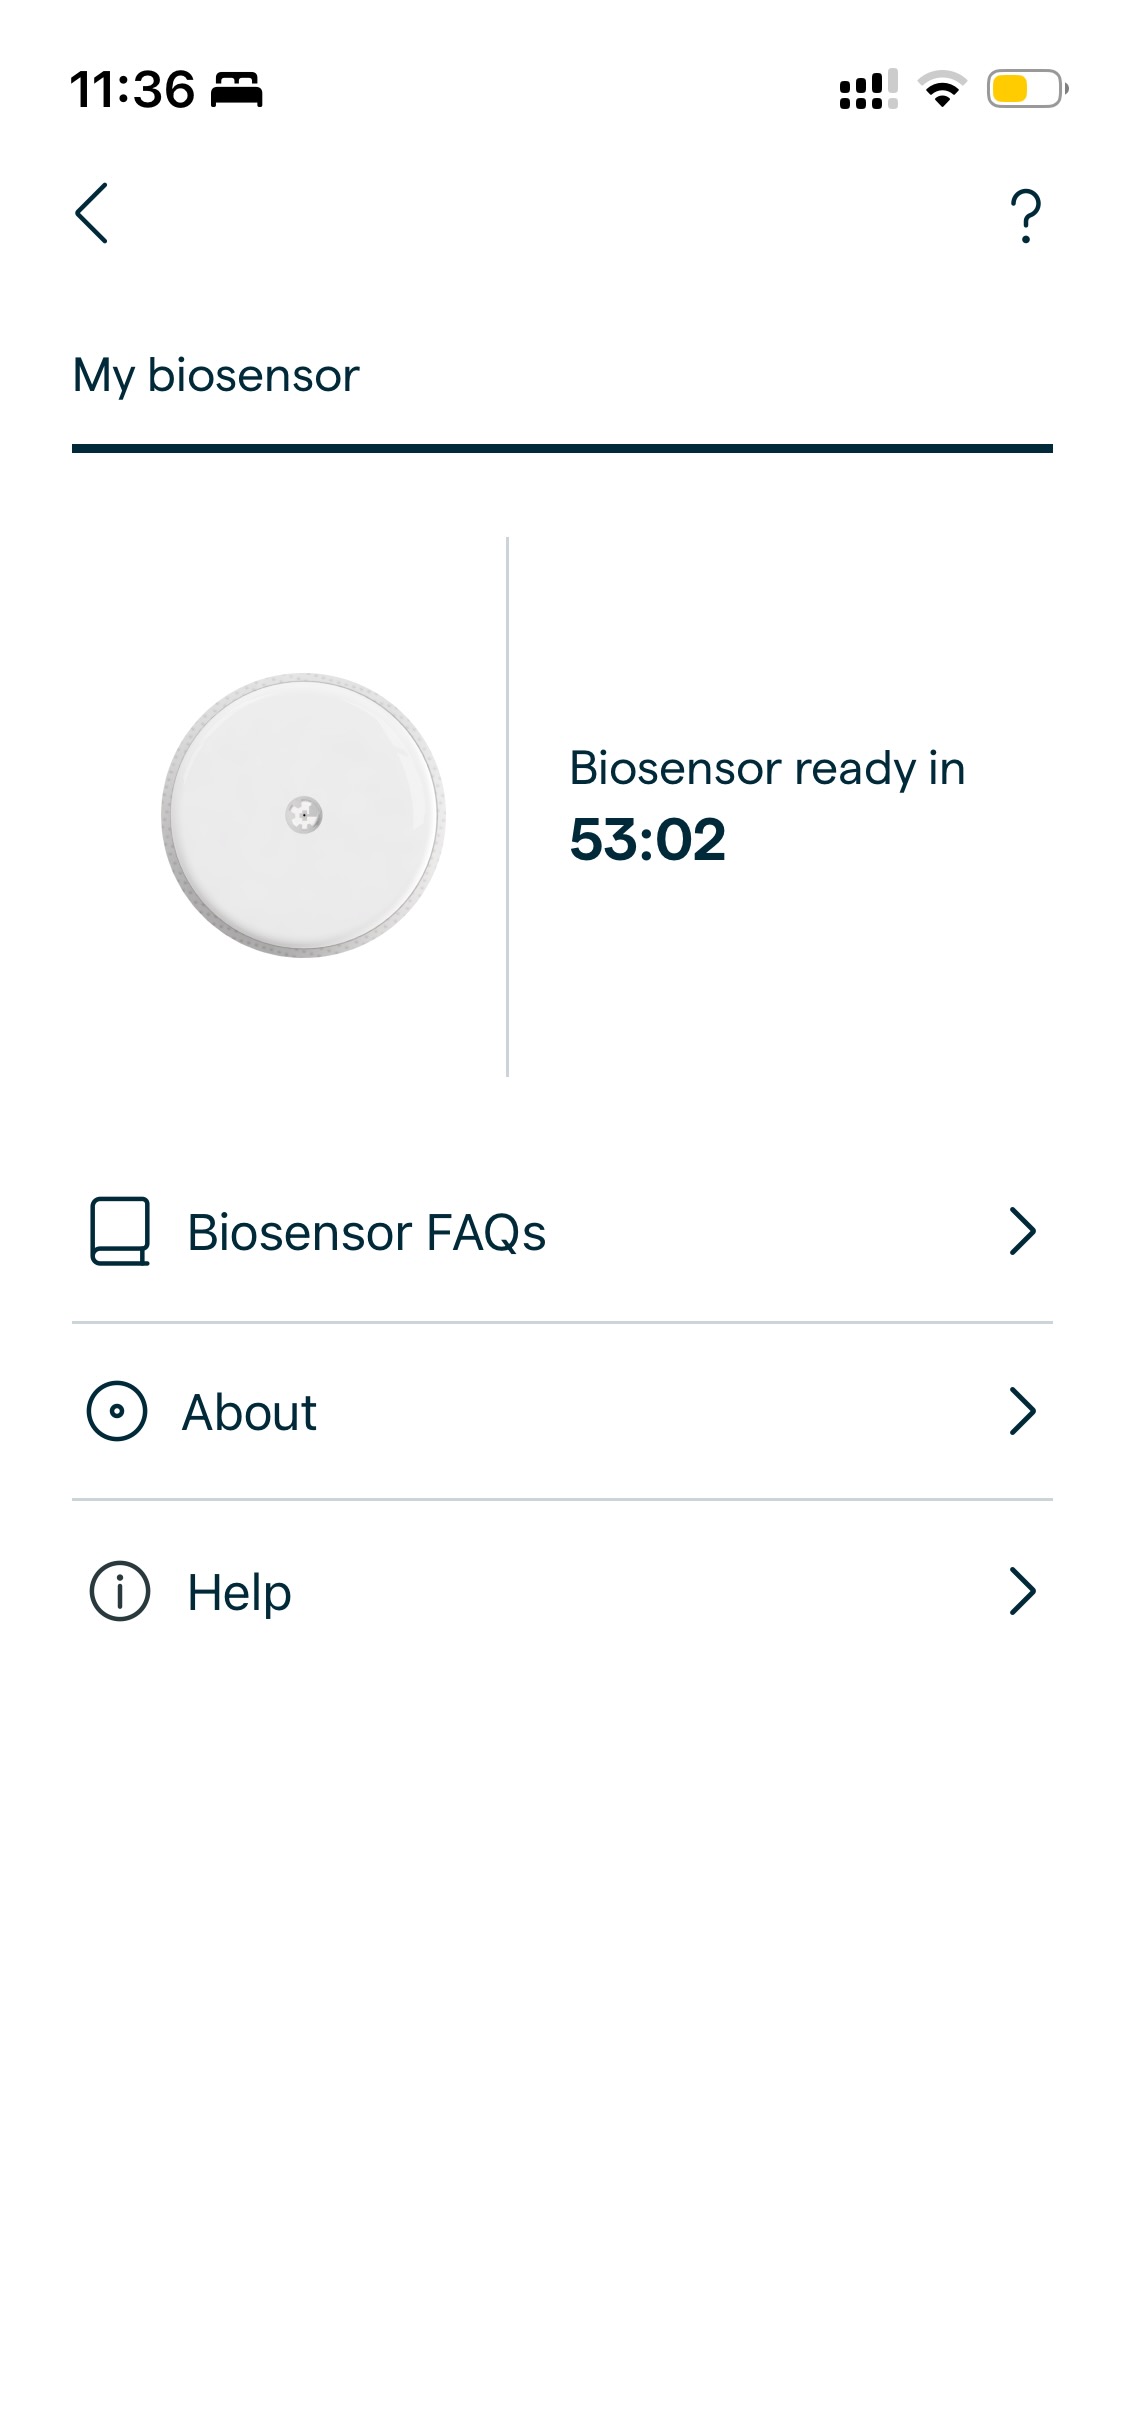
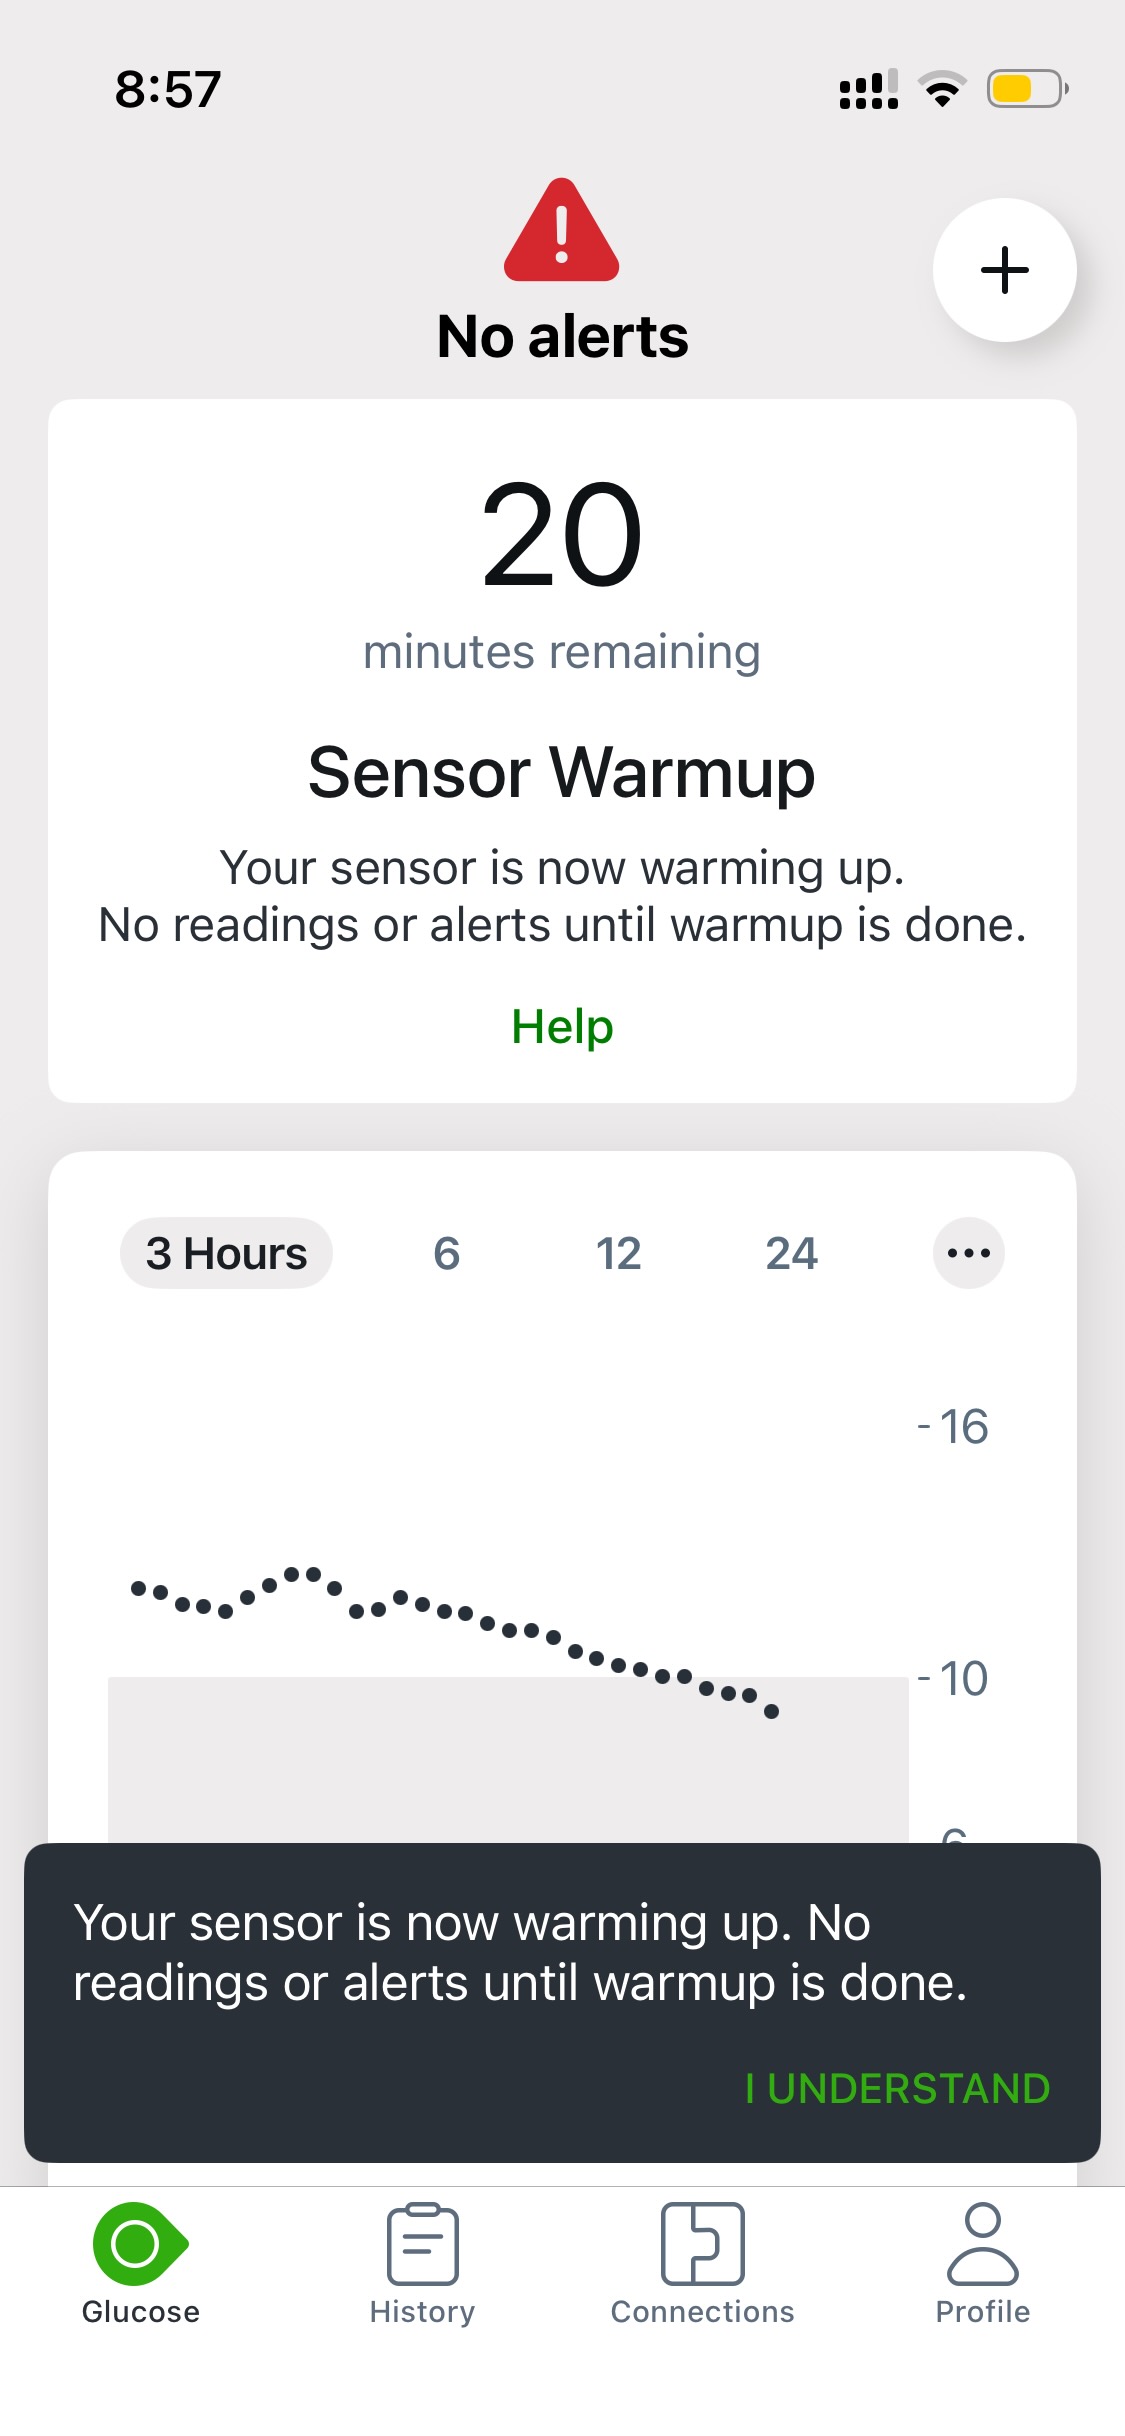
By contrast, the ONE+ has a 30-minute warmup period, which begins when you apply the sensor. You connect the app to the sensor using a QR code on the sensor applicator. The data is noisier after starting the new sensor, but there is not a significant discontinuity.
 |  |  |
I am finding that ONE+ sensor accuracy improves based on calibration with a morning fingerstick test. Neither Libre 3 nor Lingo permit external calibration.
Viewing glucose data
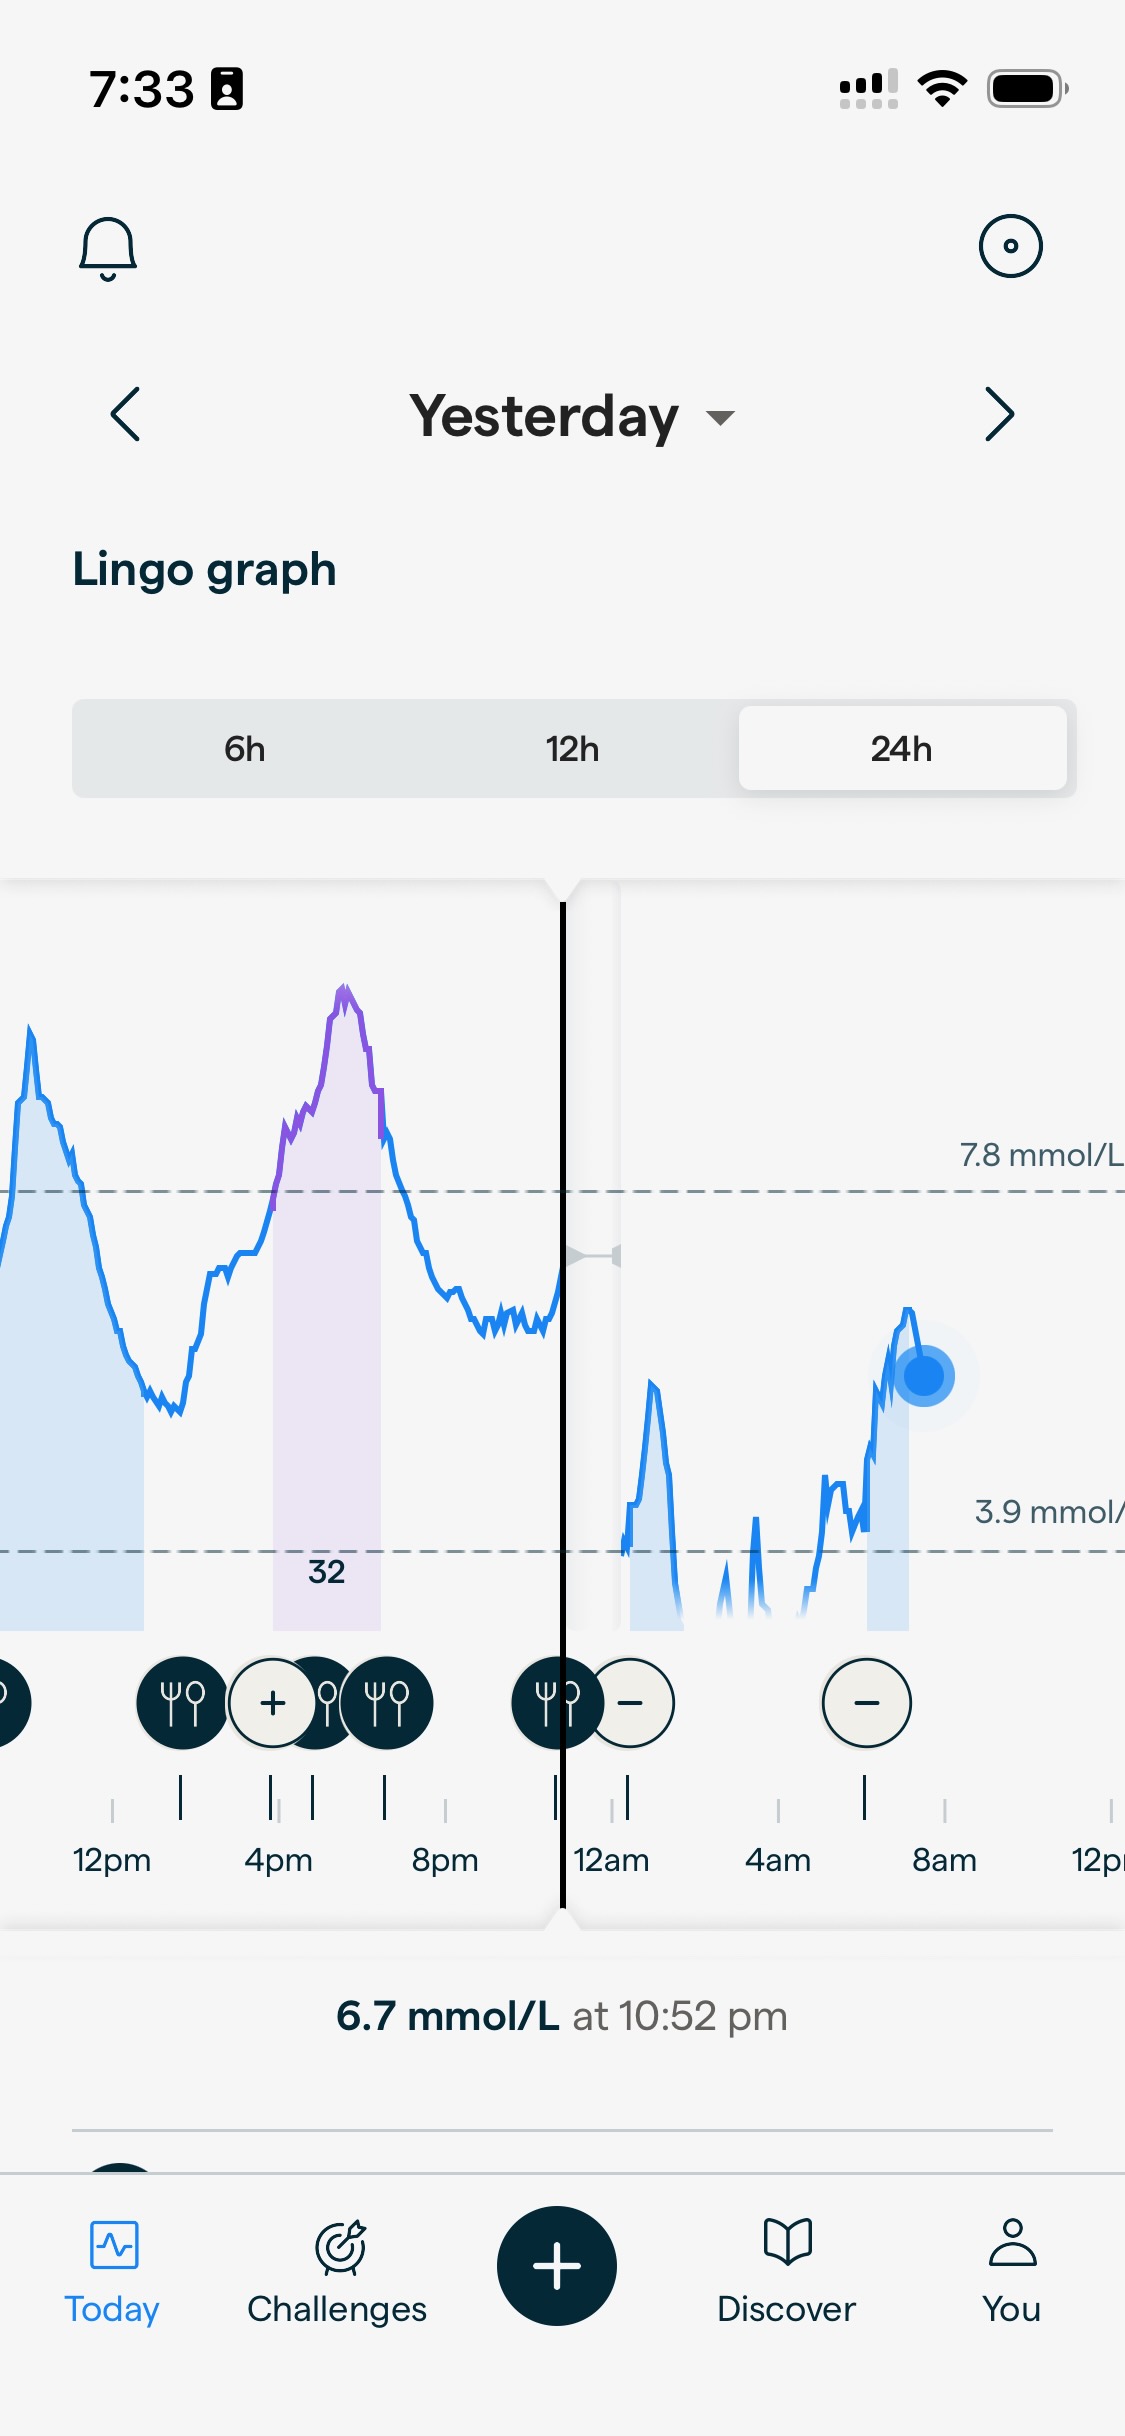
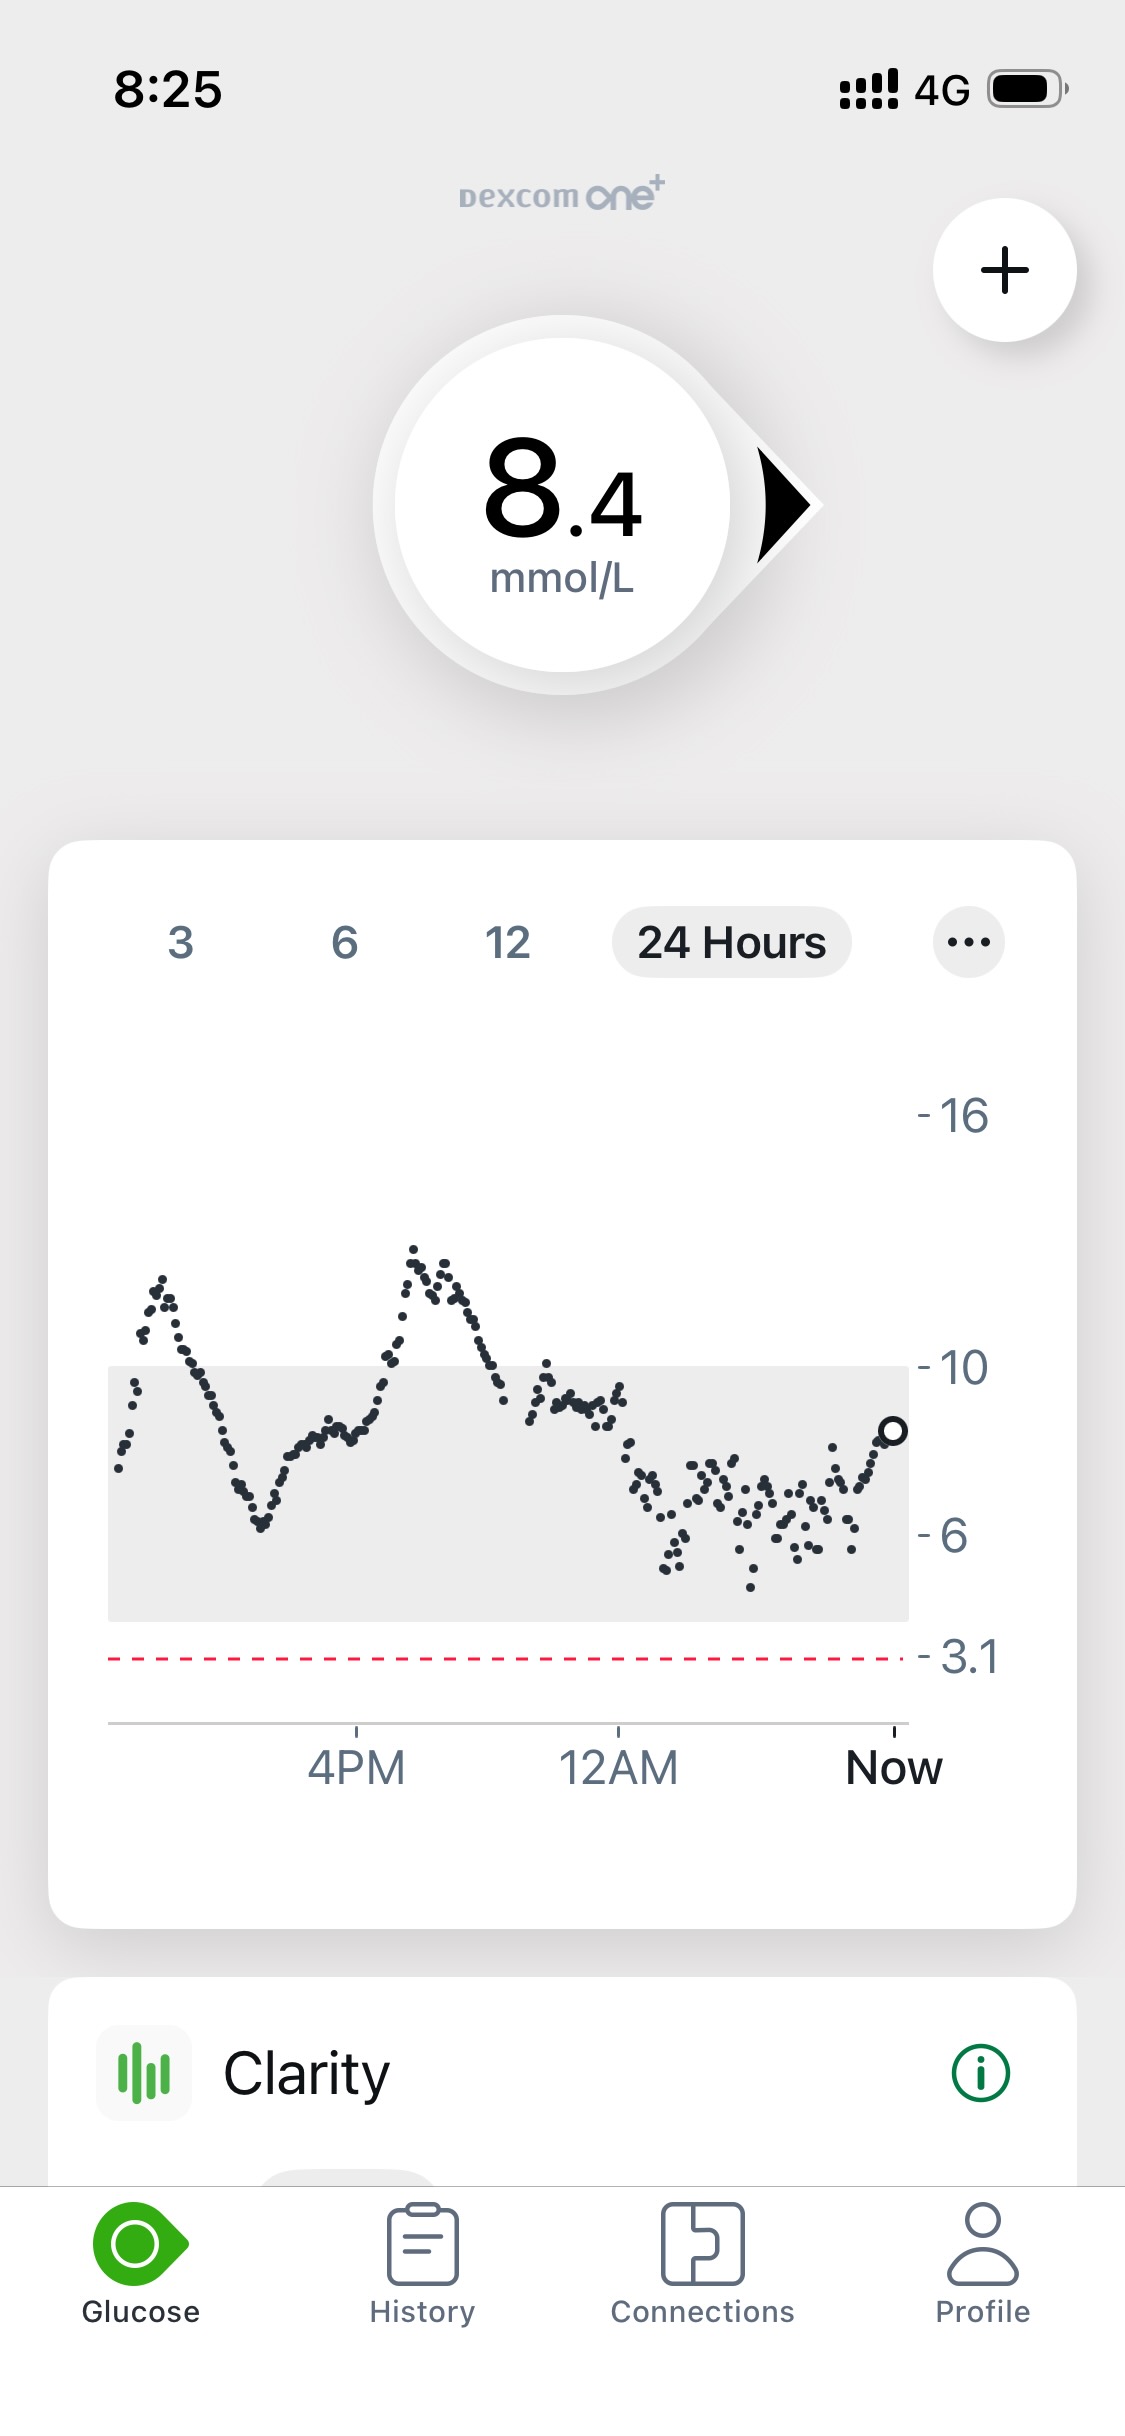
Like the Libre 3 system, the Lingo system records glucose levels once per minute. The app displays the readings as a continuous line, as shown in the screenshot above. By contrast, the ONE+ collects glucose levels once every five minutes, showing each reading as a point.
The Lingo sensor is only capable of readings between 3.1 and 11.1 mmol/L; values outside this range are clipped. I thought this wouldn’t be a problem for me because I don’t inject insulin, and my occasional hypoglycemia episodes are bothersome but not dangerous. However, it turned out to be very important; stay tuned for the reason why.
By contrast, the ONE+ has the same range of readings as prescription CGM systems.
Entering data
Besides the automatically collected glucose data and exercise data from Apple Health, both systems support manual logging for meals, exercise, and other notes or events. Both apps initialize event time and date automatically while permitting adjustments, but there the similarity ends.
Lingo meal data entry is fussy. It has you choose from a dropdown what type of meal you ate – by default, breakfast, lunch, dinner, or snack – initialized based on the time of day. You are prompted to log each separate food item, autocompleting from a long (but still not comprehensive) list of food items.
ONE+ meal entry asks for just two things: a description and carb grams. The free-form text entry is much less fussy than choosing food items one at a time, whether I’m logging the same meal I eat over and over or a one-of-a-kind meal I will never eat again. As a diabetic, I’ve learned to estimate portion sizes. I think it keeps me honest to record carb grams rather than just a list of foods.
Beyond meal and exercise events, ONE+ allows you to note your wake-up time for a record of fasting glucose – another key indicator for diabetic glucose management. You can record fingerstick test results, either for system calibration or simply to log the test result alongside the CGM data. Finally, you can record insulin dose events. This is not a feature I use, but it’s not so prominent as to get in the way of the features I do use.
Both apps can record meals while a new sensor is warming up, which was a problem with the old Libre 3 app. But Lingo cannot record meals while your phone is in airplane mode or otherwise lacks a network connection, while ONE+ accepts data entry at any time.
Getting feedback
Like other CGM systems for diabetics, the ONE+ app displays GMI, average glucose, and percentage of time in target range computed over a 7-, 14-, 30-, or 90-day window. For quicker feedback, the ONE+ app can also display average glucose and time in range over a 3-day window, which is too short to compute a GMI. I think the 3-day minimum makes sense – average glucose is not really meaningful over a 24-hour window when your overnight fasting glucose levels depend in part on your behavior the day before.
Meals and other events are listed on the “History” tab separate from the main “Glucose” tab. You can click on a meal to see a small chart of glucose levels from the meal time until two or three hours later. This screen also displays exact glucose readings for mealtime and two or three hours later. It would be nice if it also computed the rise over that period, since this is one of the things diabetics are told to manage.
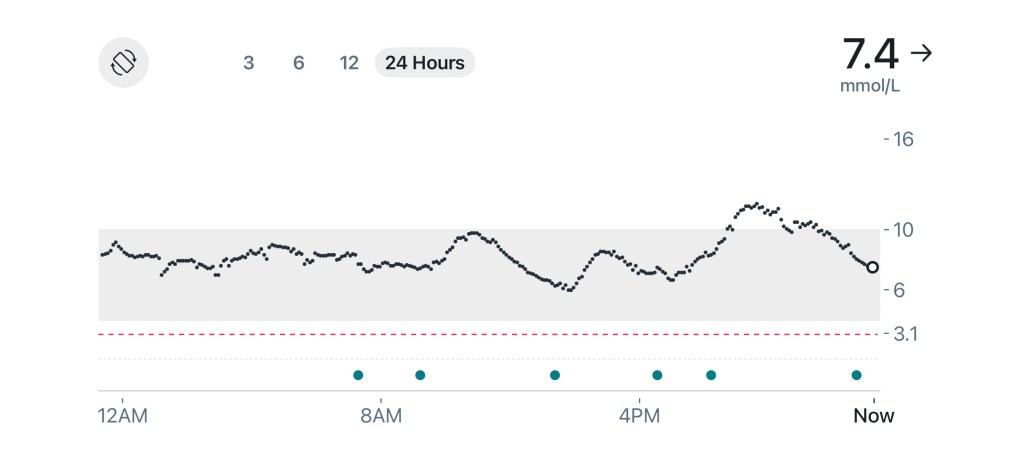
Meals are not marked on the small glucose chart on the main screen. But they are marked on the larger chart that is shown if you rotate your phone into landscape mode (see below). I wish the event dots had vertical lines to connect them to the glucose date. I wish they were differentiated by event type. And I wish you could touch them to go into the event detail screen.
The Lingo system does not provide a GMI. I eventually realized it is not capable of providing an accurate GMI, because glucose readings are clipped to such a narrow range. Instead, a rather opaque proprietary metric called the Lingo Count is used to provide immediate, daily, and weekly feedback on glucose spikes. The Lingo app also sdisplay average daily glucose – all the way down at the bottom of the main screen – with a separate screen showing trends over a 7-day, 14-day, or 30-day period, or over all time.
Meals and other events are shown in the main glucose chart and in an event log you can find by scrolling down below the main glucose chart. When Lingo detects a spike, it prompts you to add a meal or other event at the time the spike began. You can opt instead to remove the Lingo Count from your daily total, if you think the spike was detected in error (as they often are).
The Lingo app also offers suggestions, information, and weekly goal-setting challenges. I found the suggestions mostly unhelpful, and I did a few weekly challenges before I decided they weren’t teaching me anything new.
Ending a sensor
The Libre 3 app informs you continuously on the main screen of how much time is left on your sensor – very important to know if you rely on your CGM for medication management. By contrast, the Lingo app does not show any sensor status information on the main screen, except while readings are unavailable due to a new sensor warming up. I never figured out which group of notifications would tell me when a sensor was about to expire, so I had to put “new sensor” on my calendar as a recurring event. Otherwise the sensor expiration would take me completely by surprise.
The ONE+ app also puts sensor status information on a separate “Connections” tab. However, it provides both system and in-app notifications when a sensor is about to expire. Moreover, there is a 12-hour grace period during which the sensor continues to provide glucose date.
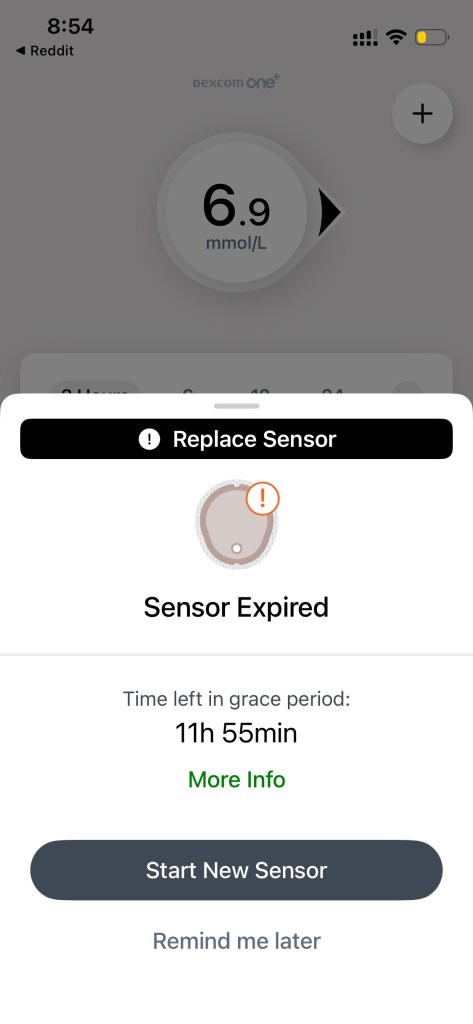
“Sensor Expired. Time left in grace period: 11h 55min.
More Info. Start New Sensor. Remind me later.”
The bottom line
For those in the UK and the EU, Dexcom ONE+ is an affordable alternative to older prescription CGM systems. While it’s not perfect – in particular, it seems to require calibration for accurate readings – the minimalist app provides exactly the information I need to manage my condition.
I cannot recommend Lingo for diabetics. I knew it lacked features required by type 1 diabetics, such as insulin dose tracking and monitoring of extreme high and low glucose levels. I didn’t realize it would fail to provide the GMI that I rely on as a type 2 diabetic.
To be honest, I would not recommend Lingo for anyone. The app is too fussy and too buggy – possible topics for future blog posts. If you are really curious about your blood glucose, try a conventional CGM system that just shows you the data.
